Lava Cakes
This post may contain affiliate links. Please read our disclosure policy.
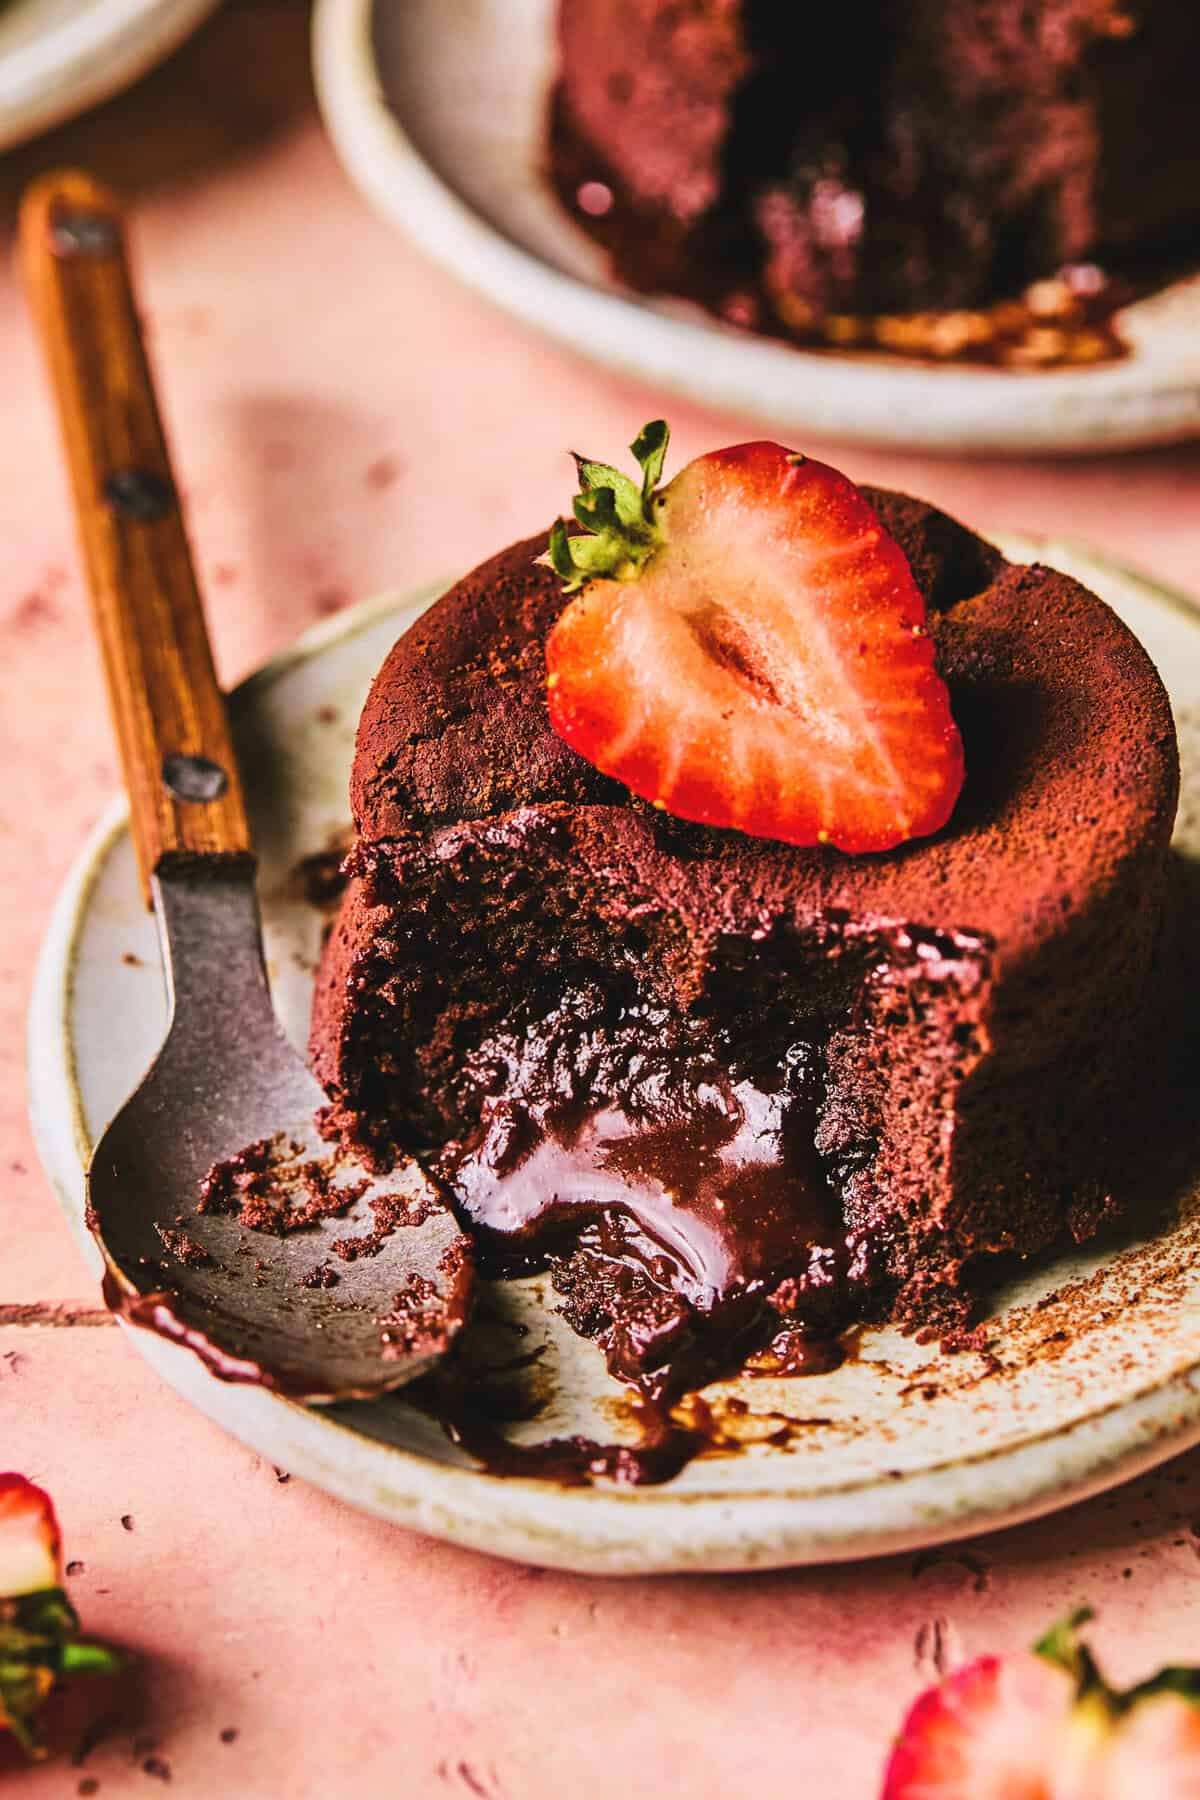
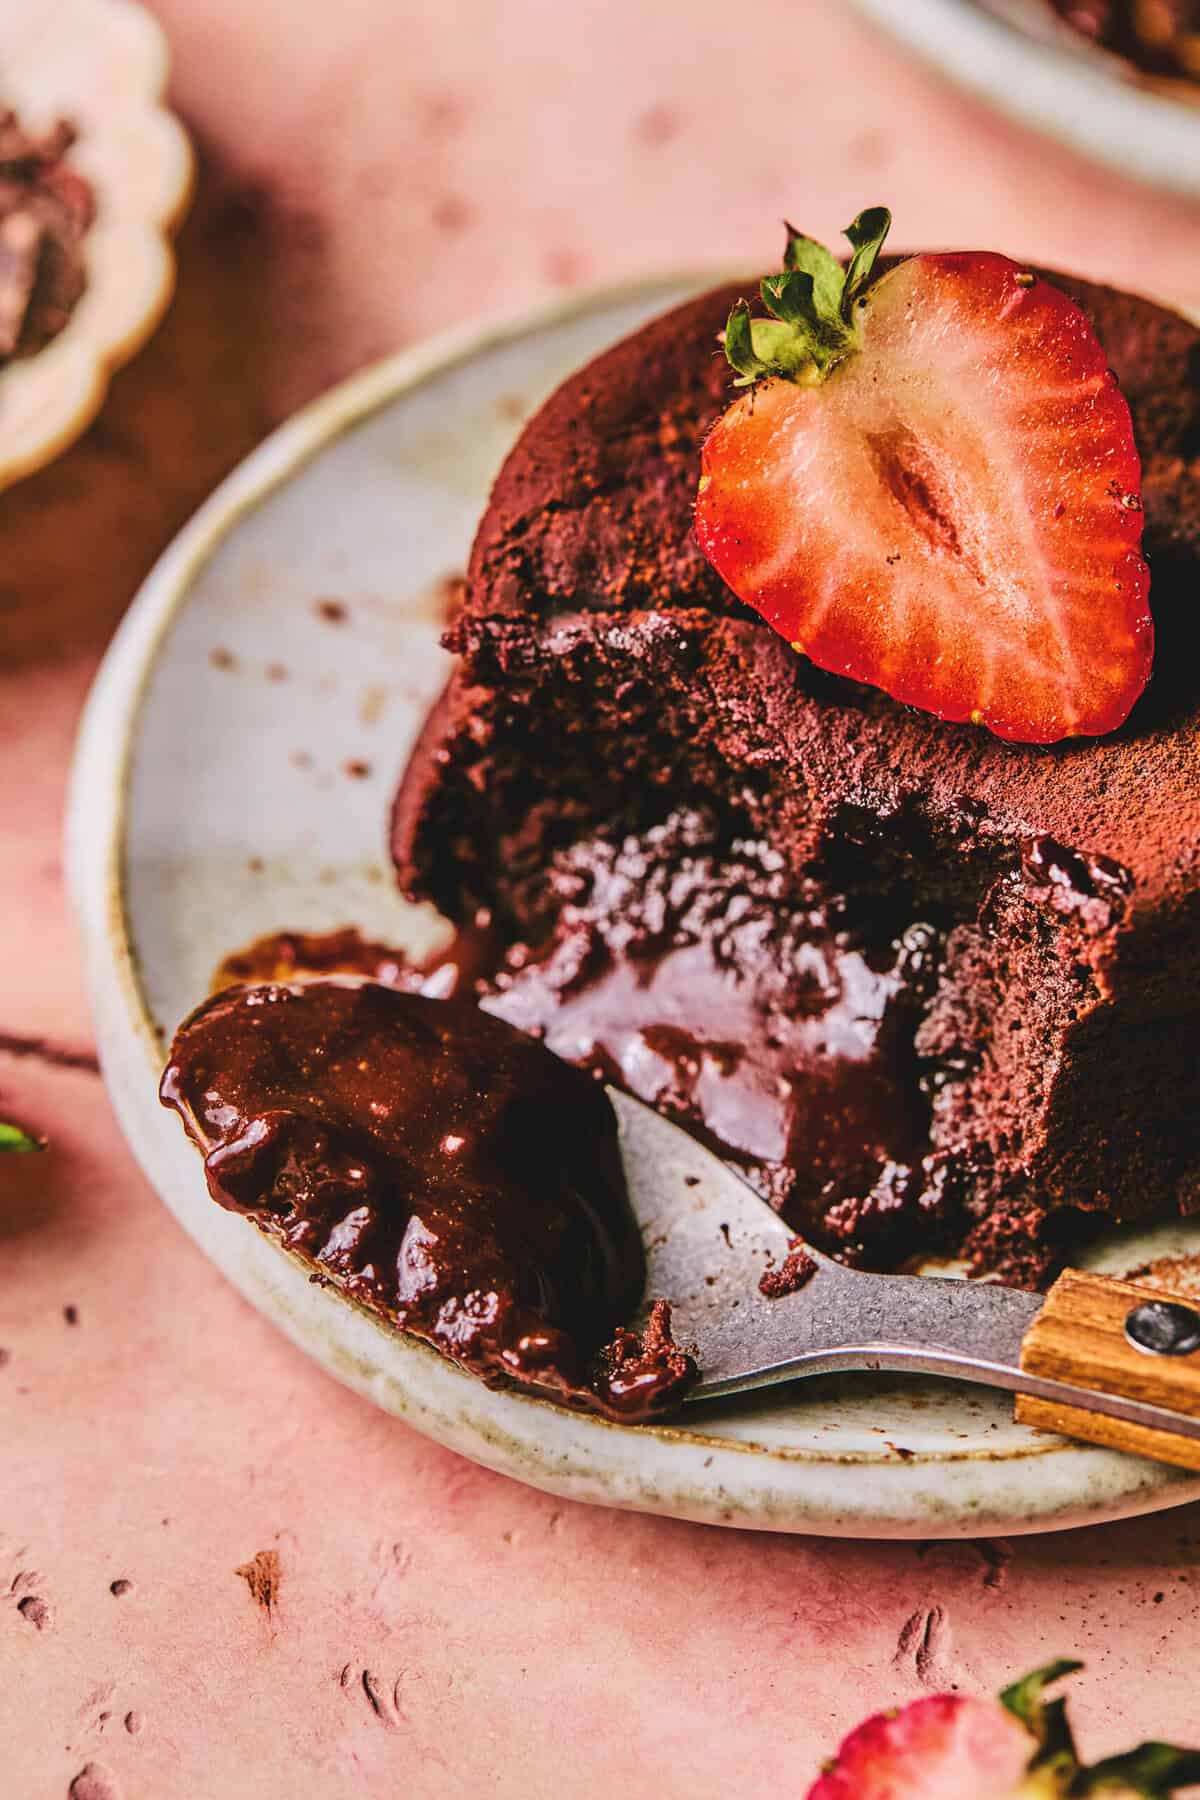
Molten Chocolate Lava Cakes are the ultimate show-off dessert for Valentine’s Day or an at-home date night. Just a handful of ingredients are needed to make these gooey-middle chocolate desserts that are delicious served with ice cream and fresh berries.
For more rich and indulgent chocolate recipes, try my Chocolate Crinkle Cookies, Cream Cheese Brownies, Fudge Ripple Chocolate Ice Cream, Chocolate Zucchini Cake, or my super special Flourless Chocolate Cake recipe!
Why This Recipe Works
I’m keeping things simple: There are LOTS of lava cake recipes out there, and some of them have really long ingredient lists you really don’t need. By keeping things simple we’re reducing the margin of error to guarantee perfectly gooey lava cakes every time.
You can make them ahead: Perfect for special occasions if you still want to serve a warm, impressive dessert but you need some time to focus on the main event. Instructions below!
Ingredients
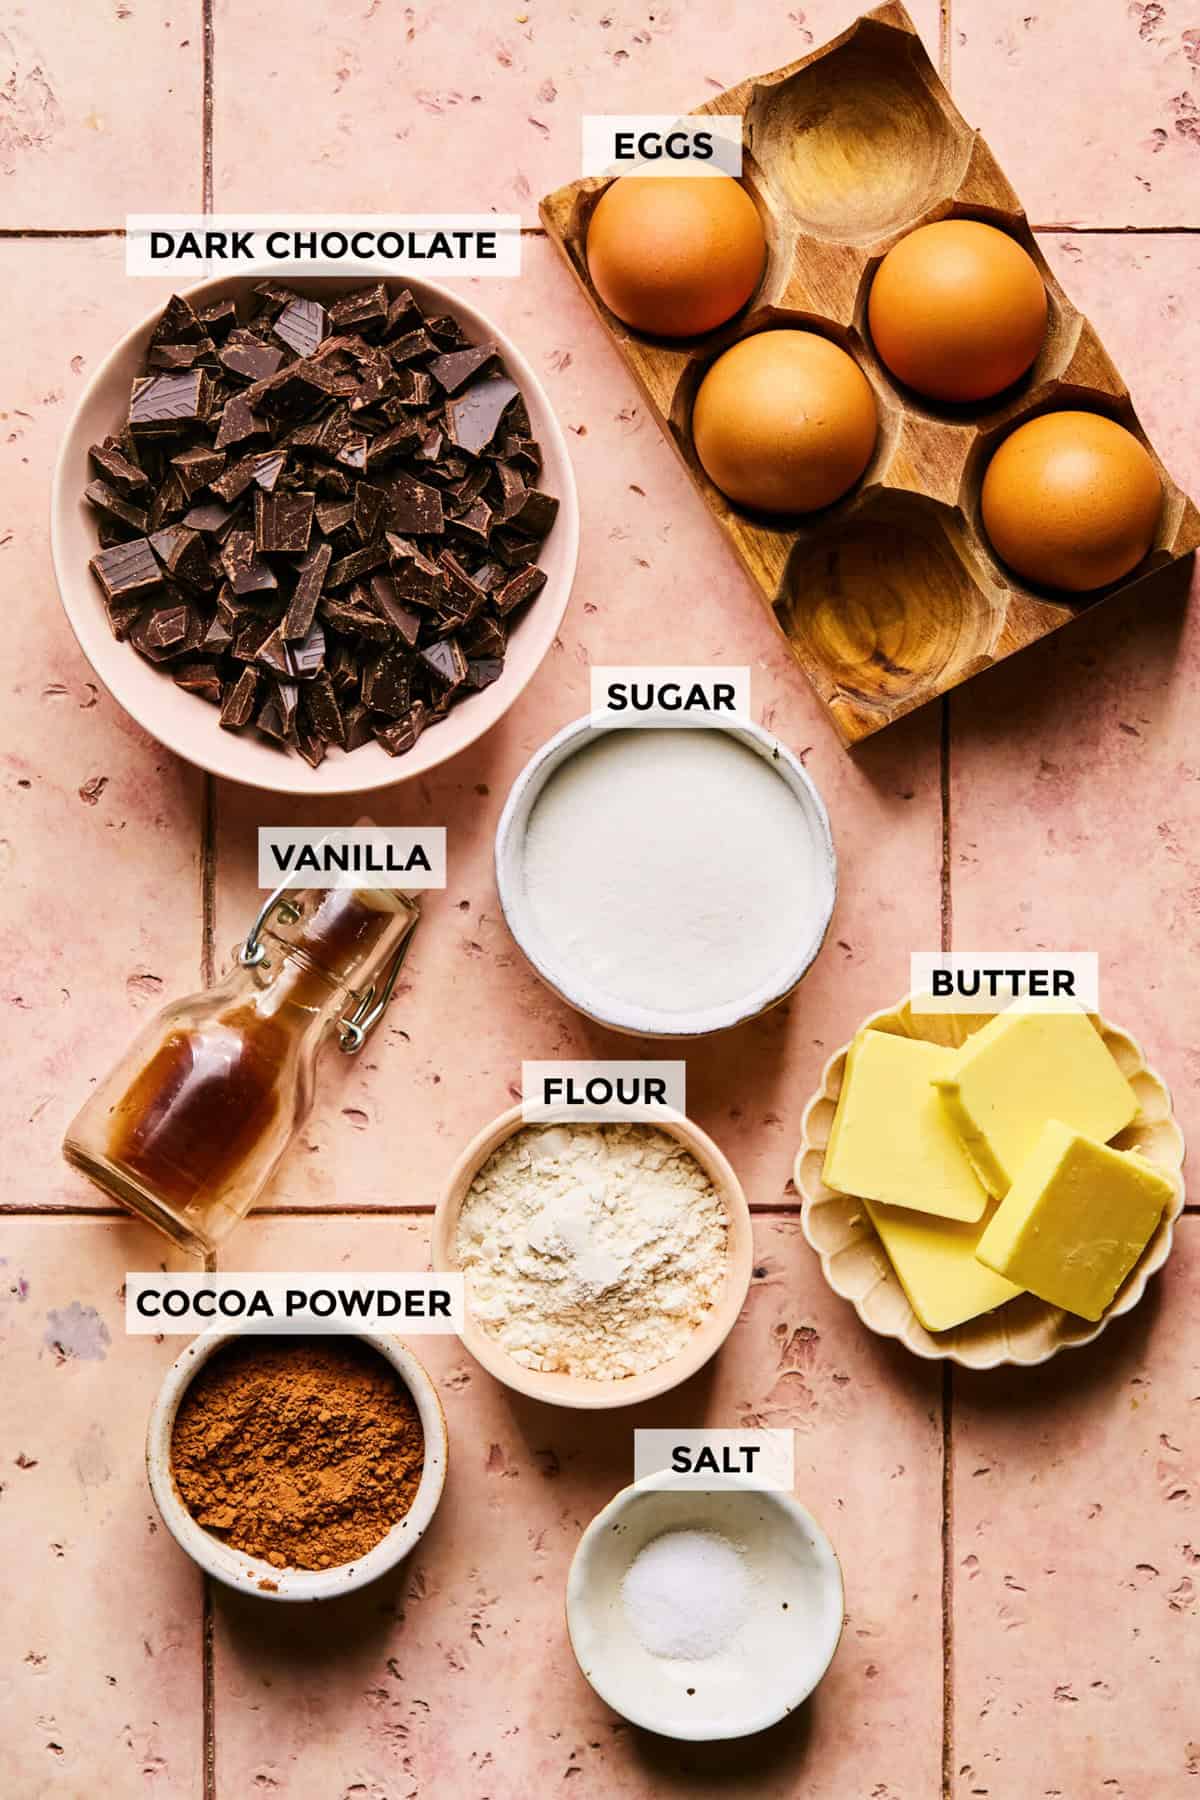
- Dark chocolate: Something with 70% cocoa solids will work well. For a sweeter lava cake you can also use semi-sweet chocolate chips.
Here’s How To Make It
- Preheat the oven: Preheat the oven to 375F. (not pictured)
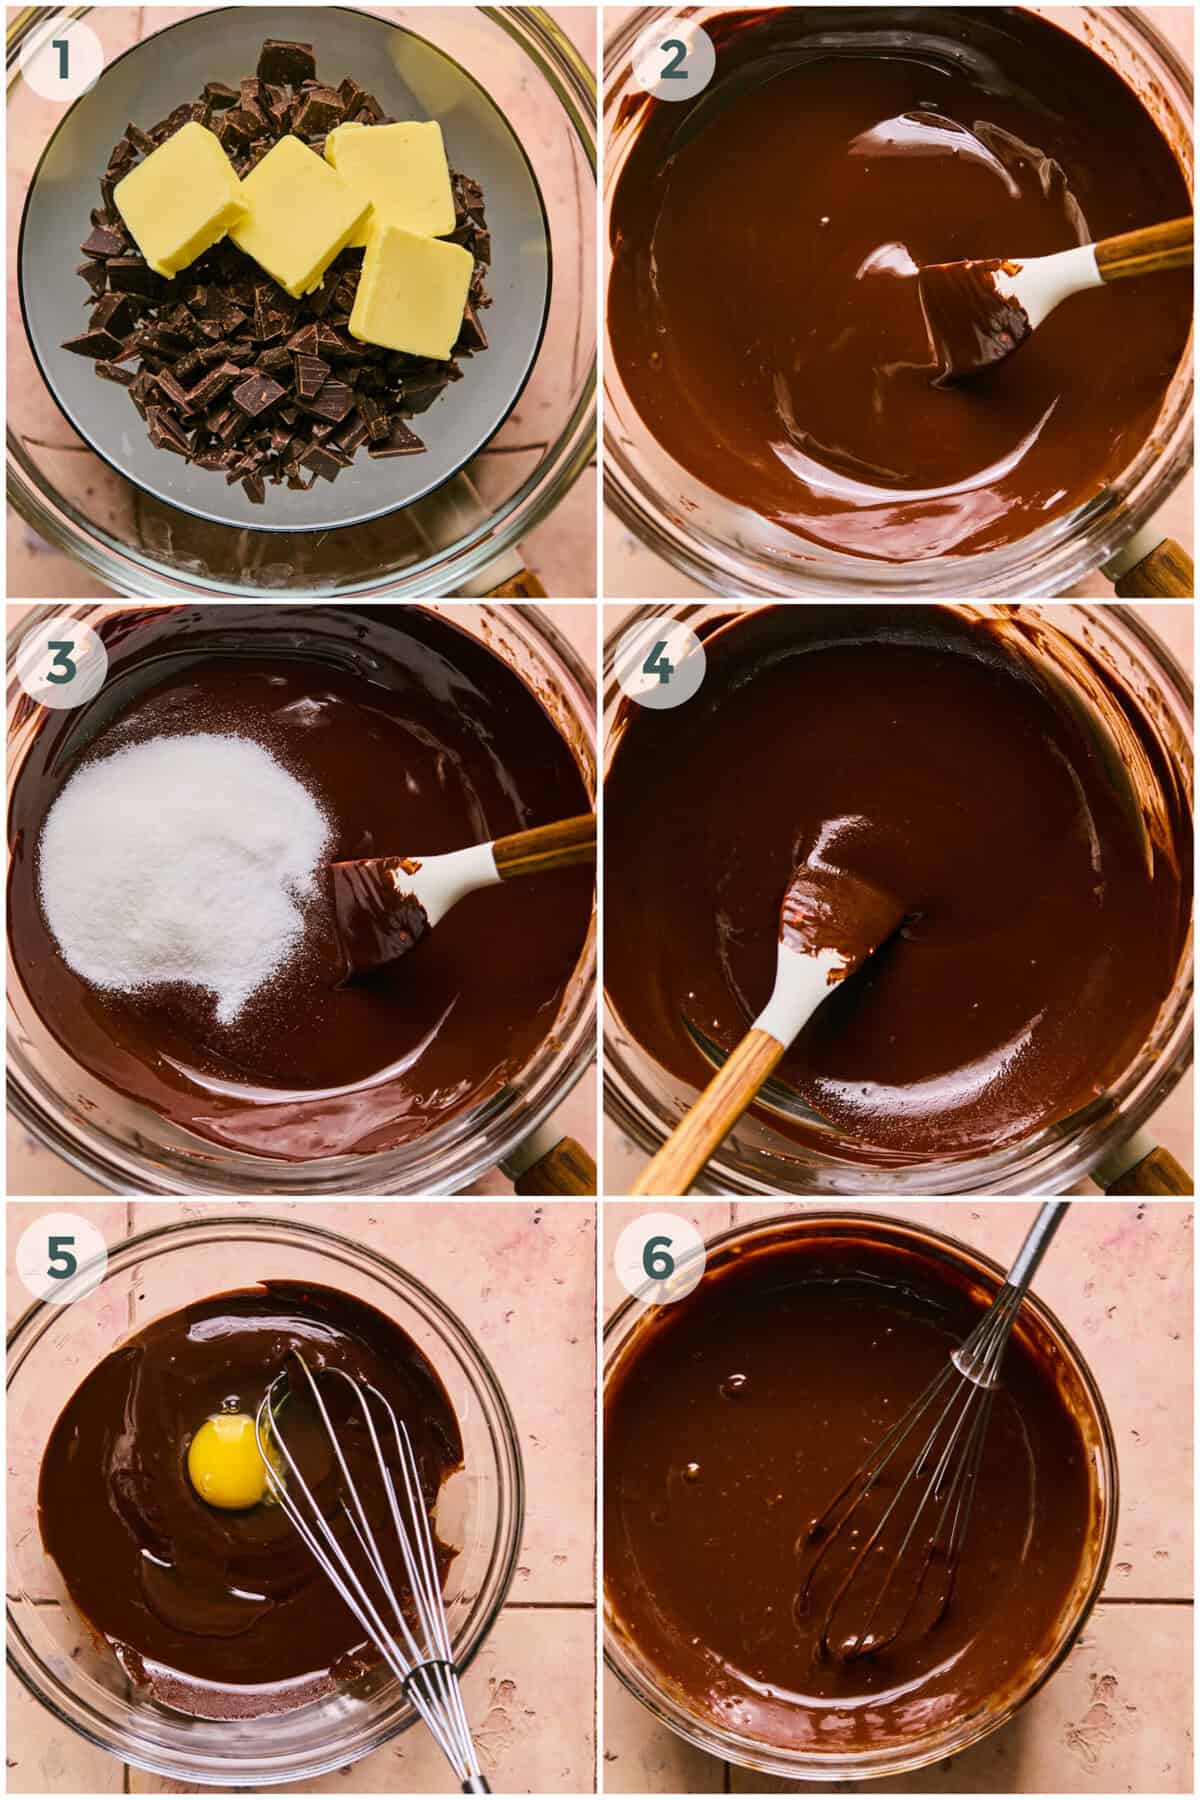
- Melt the chocolate: Place the chocolate and the butter to melt in a large, heatproof bowl on top of a pan of simmering water. Make sure the bottom of the bowl is not touching the water. (photos 1-2)
- Prepare the ramekins: Meanwhile, prepare 4 ramekins with soft butter, making sure you get it into all the corners, and dust generously with cocoa powder so each ramekin is completely coated. (not pictured)
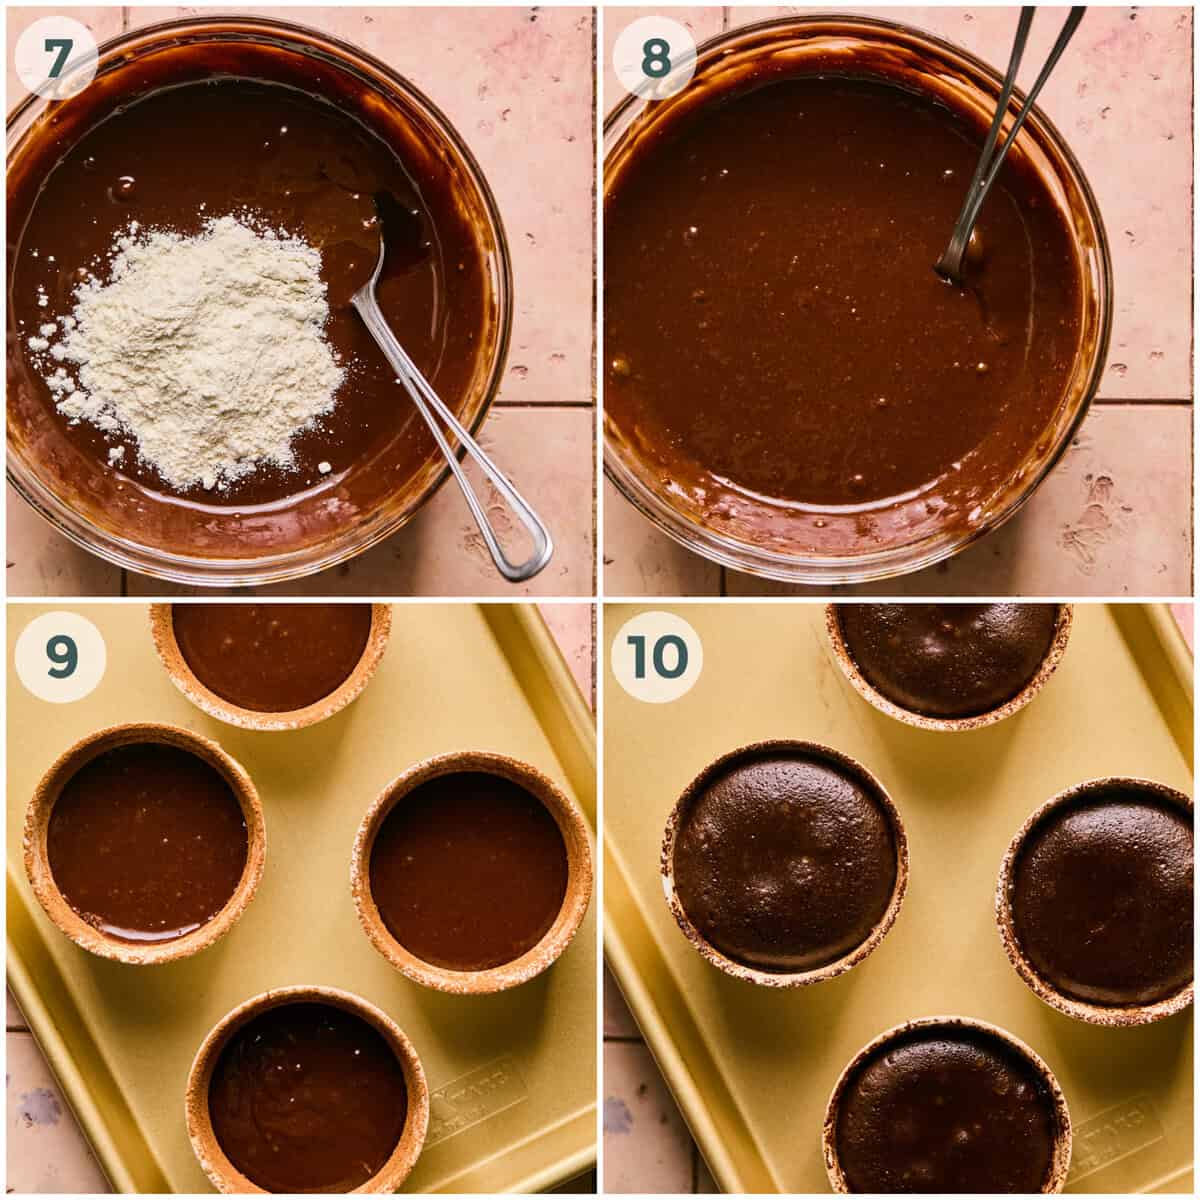
- Mix the batter: Remove the butter and chocolate mixture from the heat and stir in the sugar and the salt. Once it is cool to the touch, beat in the eggs one by one, then stir in the vanilla and the flour. (photos 5-8)
- Bake: Divide the mixture between the prepared ramekins and bake for 10-12 minutes, depending on how gooey you like the middle. (photos 9-10)
- Turn out: Leave to stand for 2 minutes before turning out onto serving plates. (photo 10)
Expert Tips
- Don’t skimp on the buttering. Just like prepping a bundt pan or getting ramekins ready to bake classic French soufflés, taking the time to make sure your ramekins are well buttered and that every inch has been properly dusted with cocoa powder will guarantee success when it comes to turning out perfect lava cakes every time!
- Take notes for next time. Chocolate Lava Cakes have a reputation for being tricky because the margin for error can be just seconds, and different people prefer the middles either super runny or just molten. Print this recipe out and write on it which ramekins you used, and exactly how long you baked them for so you know what adjustments to make if they’re slightly less than perfect the first time!
Frequently Asked Questions
You can easily make the batter and fill the ramekins a few hours in advance, just add an extra minute to the cooking time baking them from the refrigerator.
This recipe does allow a bit of leeway so don’t go buying new ramekins just to make these. I tested this in mini ceramic Le Creuset Dutch ovens, which are 3 1/2 inches in diameter.
More Easy Valentines Desserts To Try
- Best Easy Salted Caramel Brownies Recipe
- Easy Moist Chocolate Sheet Cake with Raspberry Frosting
- Simple Frosted Sugar Cookies Recipe
- Easy Strawberry Shortcake
- Red Velvet Cake
- Easy Chocolate Peanut Butter Pretzel Hearts
- Best Red Velvet Cookies with Cream Cheese Frosting
Did you make this recipe? FANTASTIC. Please rate the recipe below and be sure to tag me on social when you share a photo on social – I love seeing what you’re up to in the kitchen!

Lava Cakes
Ingredients
- 1 cup dark chocolate, chopped
- 4 tbsp butter, plus extra for the ramekins
- ¼ cup sugar
- ⅛ tsp salt
- ½ tsp vanilla
- 3 tbsp flour
- cocoa powder, for dusting
- 4 eggs
Instructions
- Preheat the oven to 375F.
- Place the chocolate and the butter to melt in a large, heatproof bowl on top of a pan of simmering water. Make sure the bottom of the bowl is not touching the water.
- Meanwhile, prepare 4 ramekins with butter, making sure you get it into all the corners, and dust generously with cocoa powder so each ramekin is completely coated.
- Remove the butter and chocolate mixture from the heat and stir in the sugar and the salt. Once it is cool to the touch, beat in the eggs one by one, then stir in the vanilla and the flour.
- Divide the mixture between the prepared ramekins and bake for 10-12 minutes, depending on how gooey you like the middle.
- Leave to stand for 2 minutes before turning out onto serving plates.
Notes
Nutrition
Nutrition information is automatically calculated, so should only be used as an approximation.


I love that these lava cakes feel elegant and have that “wow!” factor for special occasions but are so much simpler to make than you’d expect!
Your molten lava cake recipe says it has eggs added, but there are no eggs listed in the ingredients list
Thank you for catching that! You need 4 eggs. The recipe has been updated.
How many eggs for the lava cakes?
2??’s – Do you have to serve these right away? Maybe fix the cakes a head and do the marshmallows when ready to serve? Also how did you manage to take them out of the ramekins intact?
Spraying the inside of the ramekins with cooking spray should be good enough to make them slide right out! As far as making these ahead.. you can make the cakes ahead of time but I definitely suggest doing the marshmallow part right before serving! Thanks, Adele!
They do look good but where’s the lava?
If you want lava I suggest baking iT two mi less.
TWo minutes less, sorry typos (-;
Wow these look amazing and so easy too! Definitely the most elegant form of s’mores i’ve seen!
Thanks Chelsie! I love lava cakes but these are the ultimate! My favorite!
These look wonderful! What size of Ramekin did you use?
I used four 6-ounce ramekins!
Thank you! I can’t wait to try it!
Whoa! These look absolutely amaaaazzing! Seriously cannot wait to try them! Lava cakes have always been my weakness, but I’ve never had a s’mores one!
Tiffany, this is really a great dessert! I appreciate the innovativeness behind combining two desserts into one fab dessert like this one. Well done and wish you a Happy New Year!!