Red Velvet Cake
This post may contain affiliate links. Please read our disclosure policy.
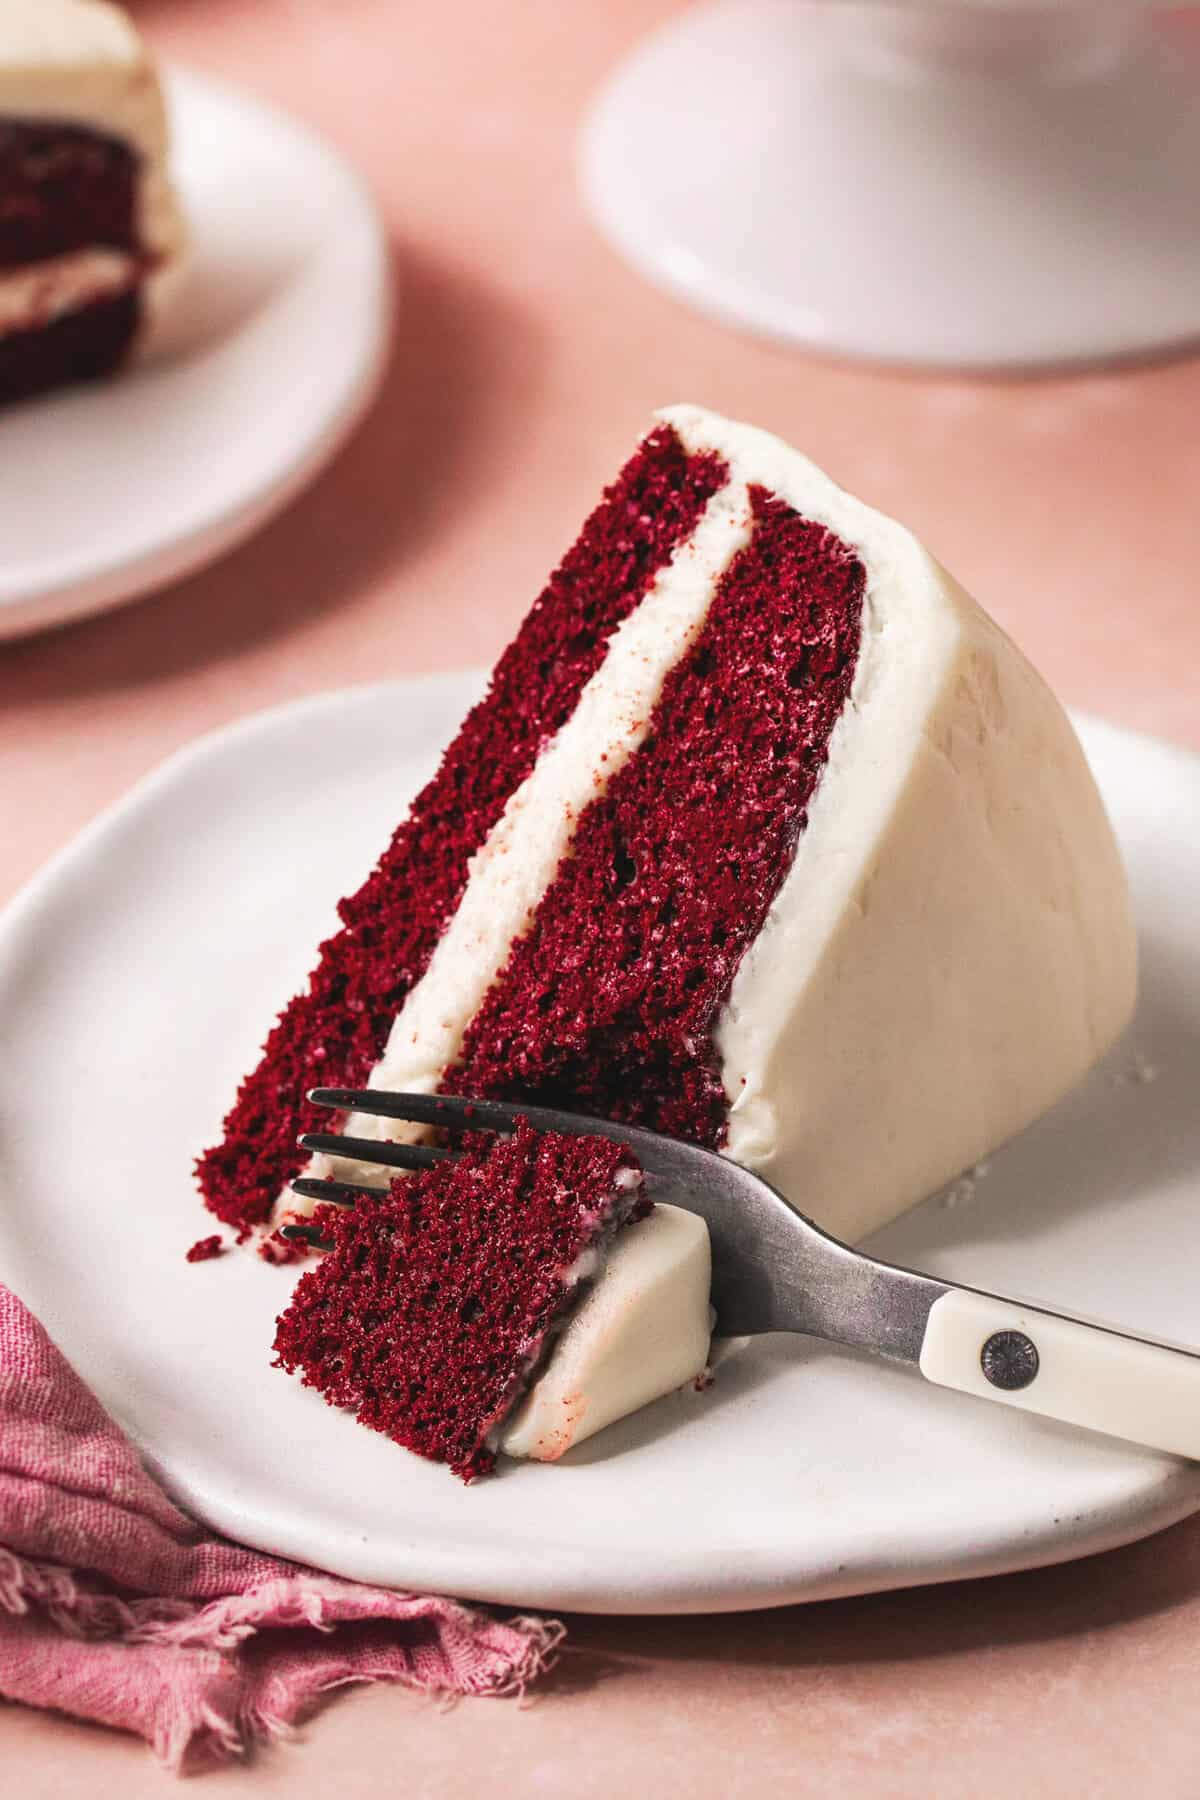
The best rich Red Velvet Cake is so moist and easy to make, and is made even better with the addition of thick, creamy, sweet, out-of-this-world cream cheese icing.
For more delicious cake recipes, head on over to my posts for Carrot Cake with Cream Cheese Frosting, German Chocolate Cake, and Spice Cake with Brown Sugar Frosting.
Why This Recipe Works
Impressive — That’s right, you can impress your friends and family with a red velvet cake that will look — and taste — like it came straight from a fancy bakery. I’m not kidding, this recipe will make you look like a pro!
Easy — I know, I know, you probably think there’s nothing easy about this cake, but I promise this recipe is. Sure, there’s a few steps and some finesse involved, but even if you are an amateur baker (me too!), you’ll be able to follow along with these directions and produce a great red velvet cake from scratch.
So soft and moist — You can thank the buttermilk and oil for the softness and moistness of the cake and the cream cheese and butter for the softness and moistness of the cream cheese frosting, which brings us to:
Cream cheese frosting — It’s pretty typical to have cream cheese frosting on this velvet cake, that’s true, but this cream cheese frosting, that I have perfected over the years on MANY cakes, is THE BEST for both between the layers and on top and sides. You’ll get a great, sweet, cream-cheesy burst of flavor with every bite of cake.
Ingredients
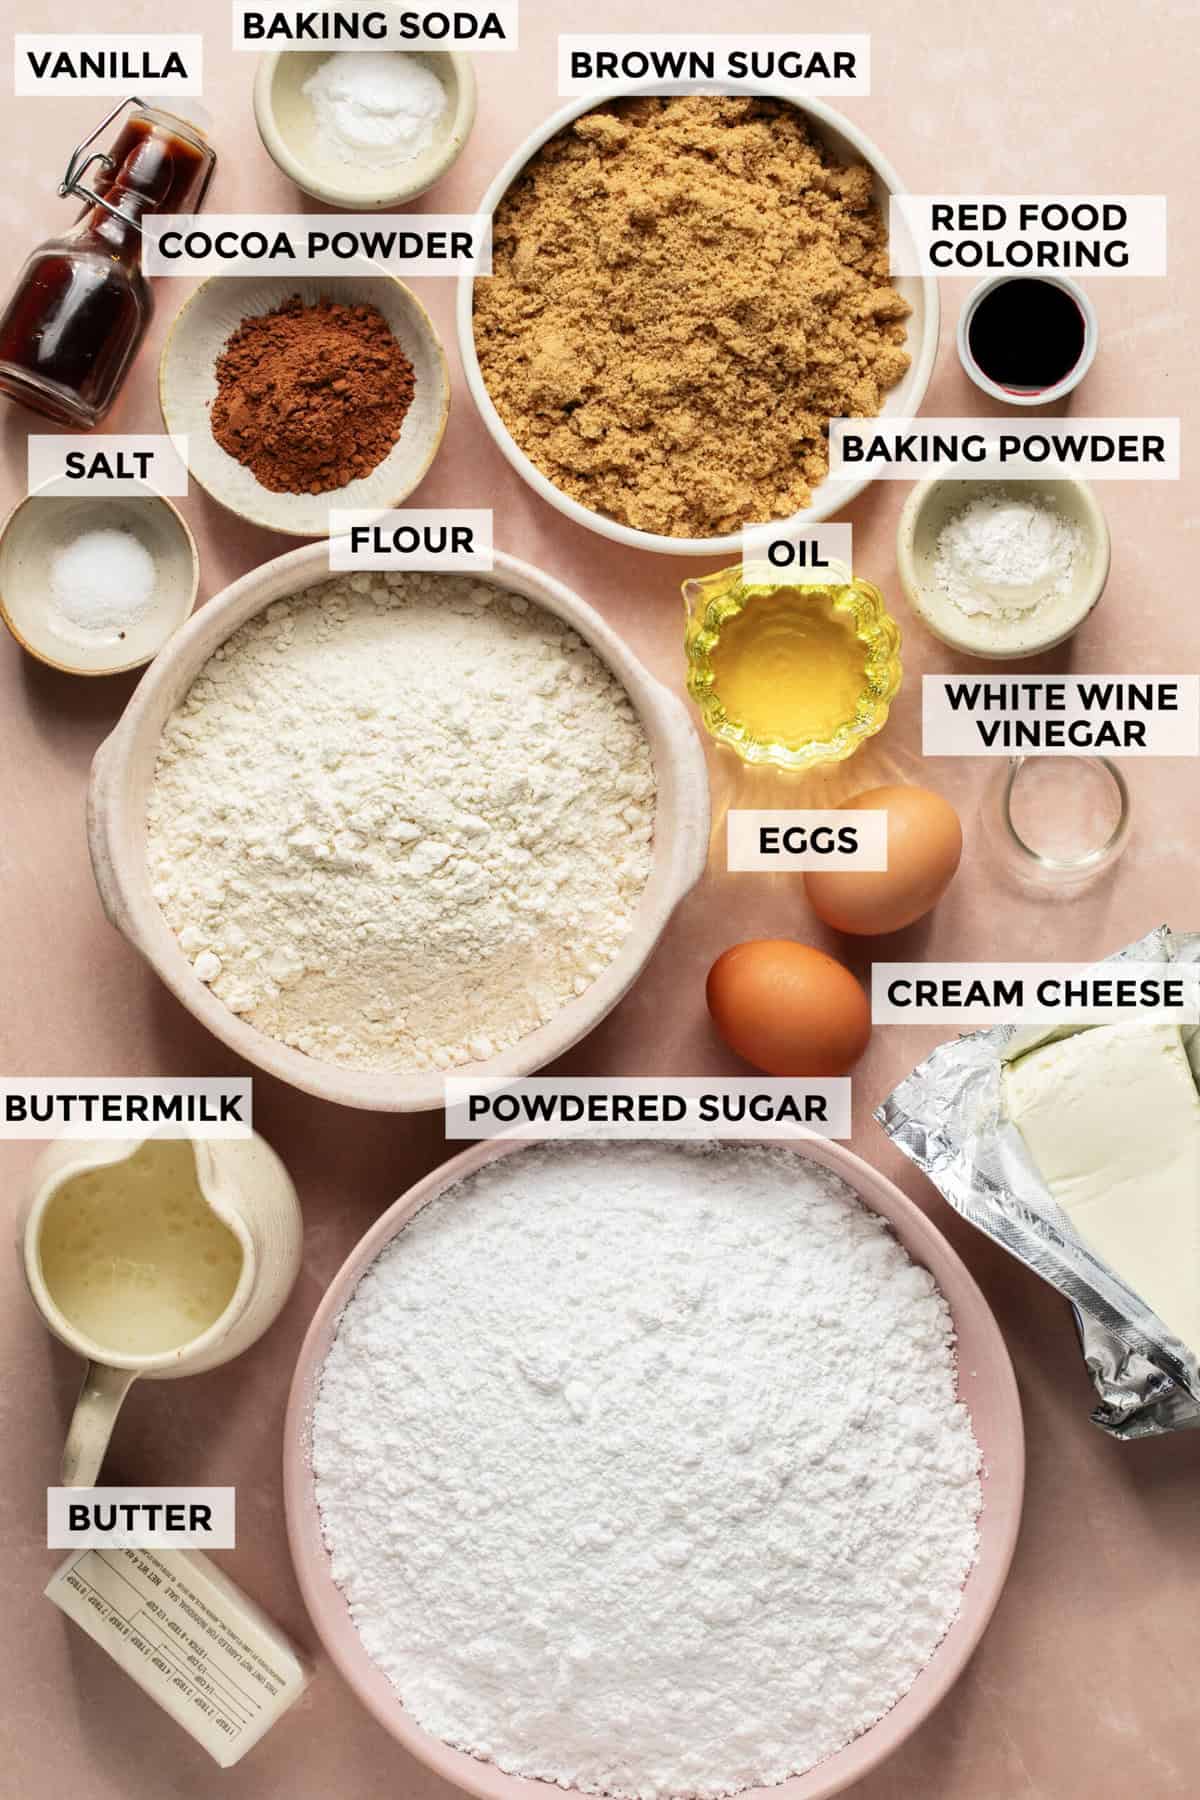
Natural cocoa powder — Natural cocoa powder is made from cocoa beans that are roasted and ground. This cocoa powder is lighter in color, which helps it take on the red dye better for this red velvet cake recipe.
Buttermilk — Buttermilk is slightly acidic and this acidity reacts with the baking soda in this recipe, making the cake rise and making it light and fluffy. Buttermilk also gives a slightly tangy taste to cakes and results in a softer crumb.
Red liquid food coloring — I hate to break it to you but if you didn’t know the red in this red velvet cake recipe from scratch comes from red food dye, then this might come as quite a shock. But yes, it’s red because of food dye. No dye, no red cake.
White wine vinegar — Vinegar also helps the cake to rise by reacting with the baking soda and creating bubbles as it bakes, resulting in a lighter cake.
Full fat cream cheese, at room temperature — The light or low-fat cream cheese just isn’t going to cut it, I’m sorry. Nothing whips up as creamy and tastes as delicious as full fat cream cheese.
Unsalted butter, at room temperature — Unsalted butter is best in this cream cheese but if you only have salted, that’s okay too. Room temperature is key too because it combines with the cream cheese and sugar so easily. You don’t want it cold and you don’t want it melted. Definitely make sure it’s room temperature before whipping together.
Here’s How You Make It
- Preheat the oven and spray your cake pans with cooking spray then line with parchment paper. (not pictured)
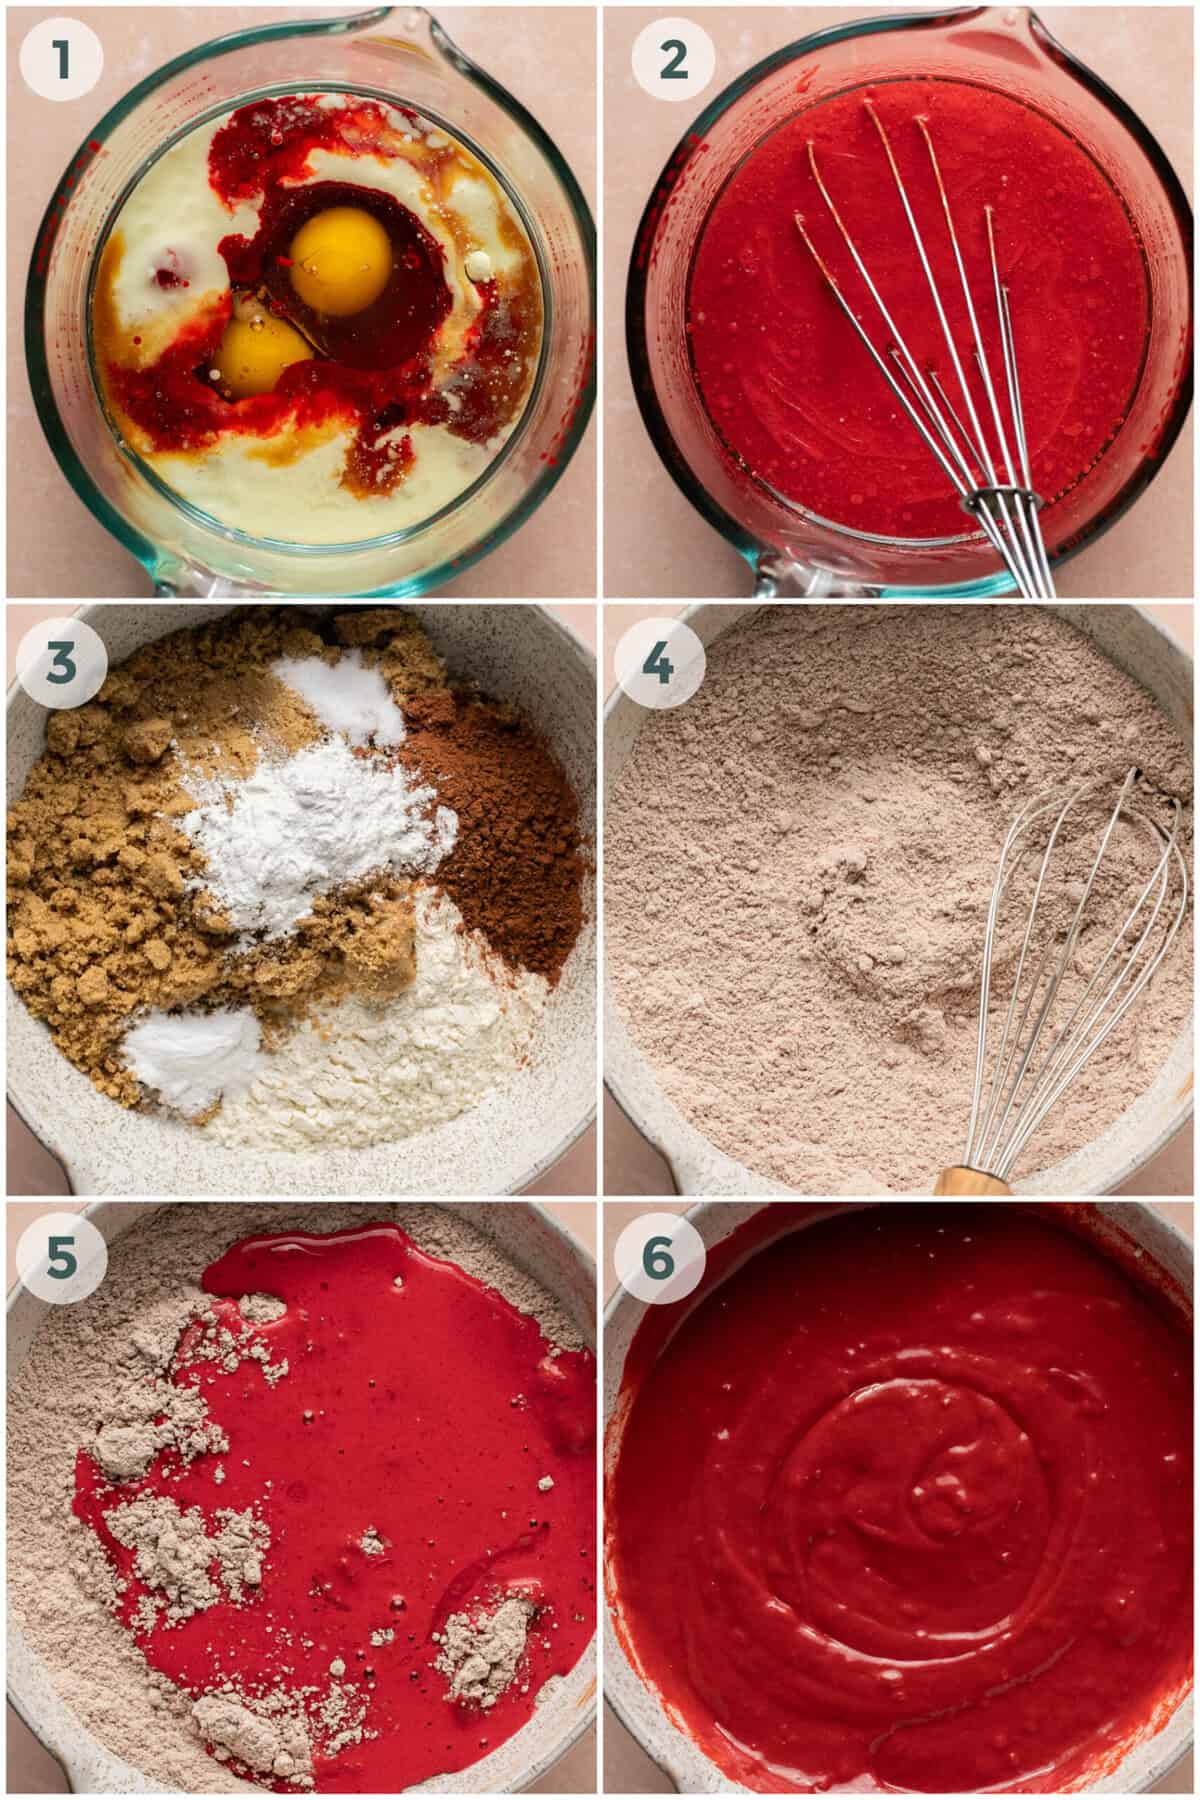
- Take out another bowl and whisk together the oil, eggs, buttermilk, red food coloring, vinegar, and vanilla. (photos 1-2)
- Whisk together the flour, brown sugar, baking powder, cocoa powder, baking soda, and salt in the bottom of a stand mixer. (photos 3-4)
- Pour the buttermilk mixture into the dry flour mixture and whisk it all together in your stand mixer. Be careful not to over mix, just whisk until there are no more lumps, no longer. (photo 5)
- Add the cake batter into the prepared pans, dropping it down onto the countertop to knock out air bubbles. (photos 6-7)
- Put the cake into the oven to bake for 40-45 minutes or until a toothpick inserted into the middle comes away clean. Allow to cool in the tin for 10 minutes before turning out to cool completely on a wire rack. (photo 8)
- Turn your attention to the frosting by getting out the stand mixer (with a clean bowl, of course) and beating together the cream cheese and room-temperature butter until smooth. (photo 9)
- Add the vanilla into the butter/cream cheese mixture and then, add the powdered sugar one cup at a time until it’s the consistency you like in a frosting. (photo 10)
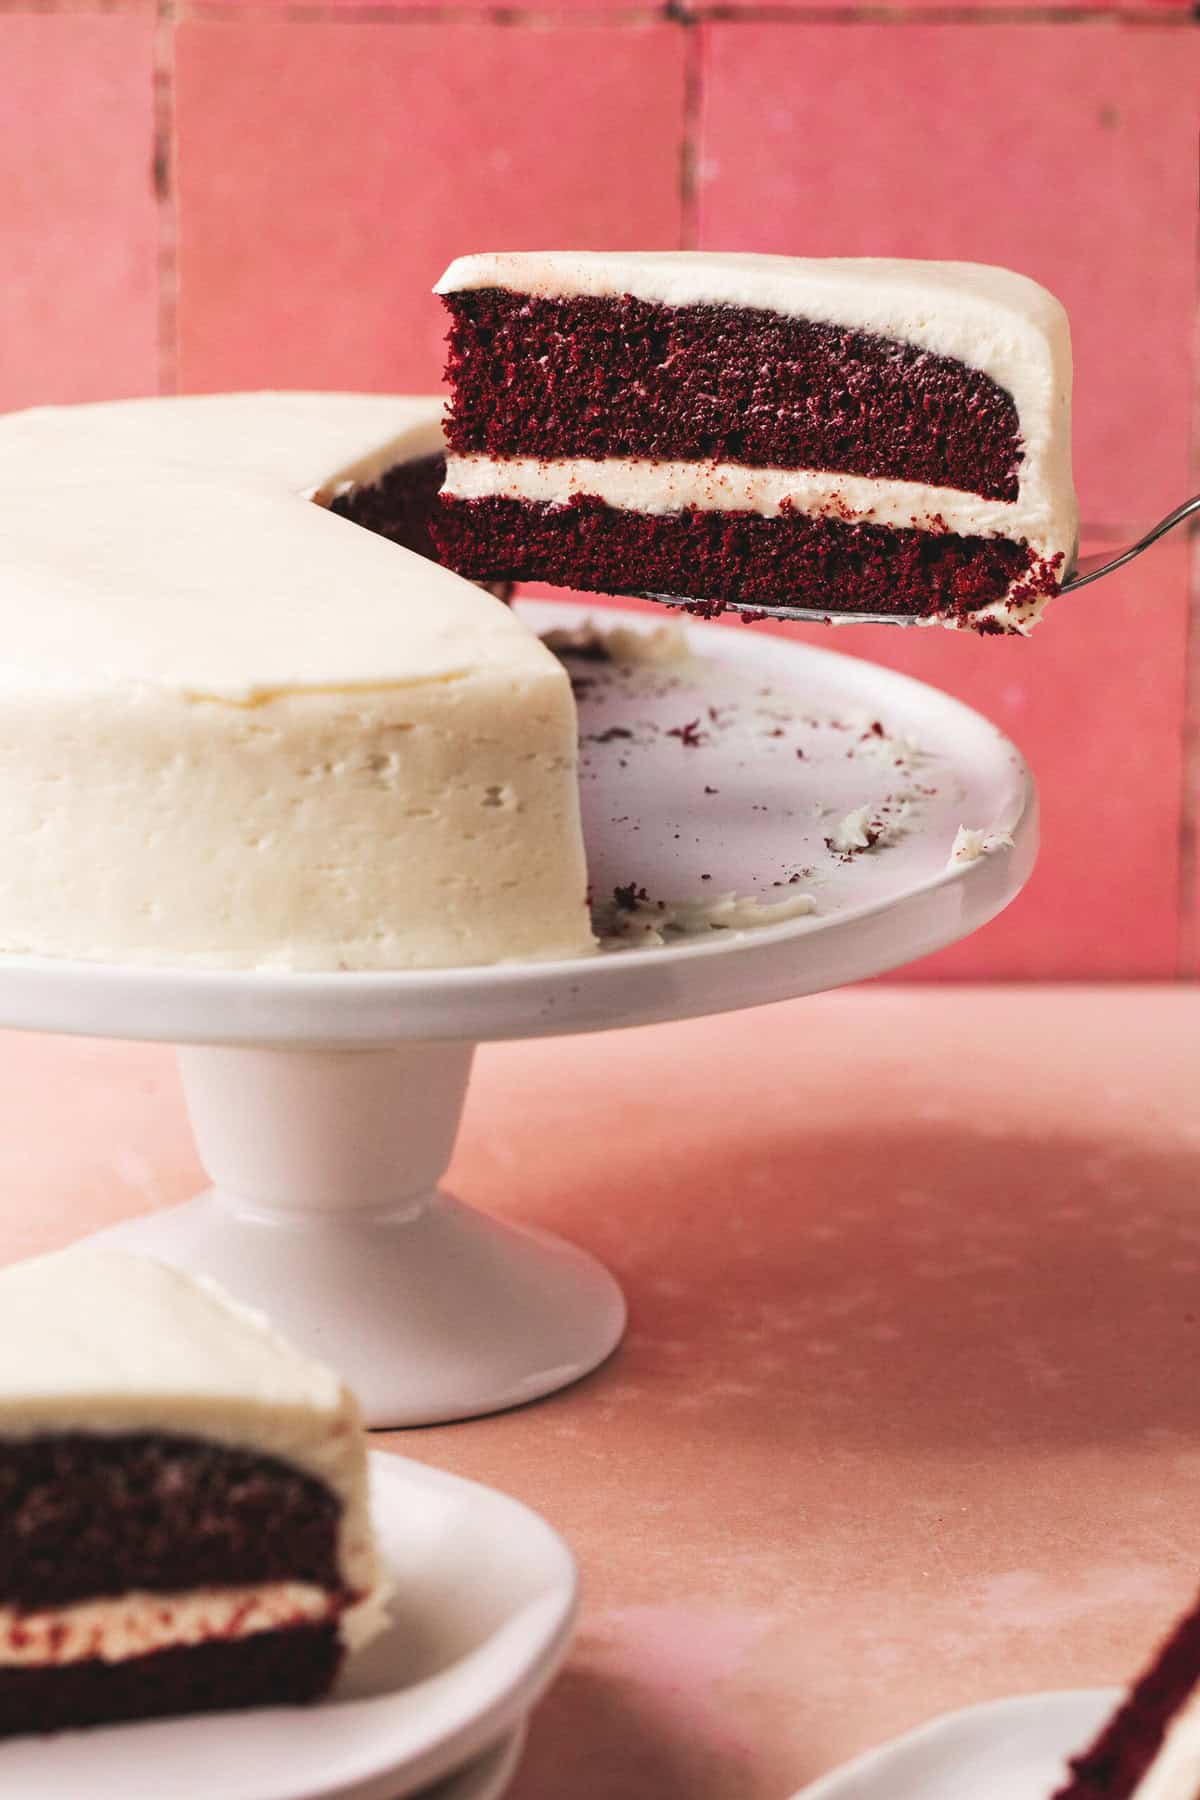
- Assemble the cake by slicing the cooled cake down the middle (lengthwise) until you have two separate layers. (photo 11)
- Put a layer on a cake pan or large plate and add a layer of icing on top. Add the second layer of cake on top of the icing, and then spread on another very thin “crumb coat” of icing. Put the cake into the fridge to chill the crumb coat onto the cake. (photo 12)
- Finish off the cake by icing the top and sides with another, final, thicker layer of cream cheese icing. (photo 12)

Frequently Asked Questions
Red velvet cake tastes like a great combo between a chocolate and vanilla cake. It has a subtle chocolate taste from the cocoa powder and then a little bit of vanilla from the vanilla extract. Then, of course, there’s the tanginess of the cream cheese frosting to round it out.
The specialness of this cake lies first and foremost in its color, which is made possible by red food dye. In addition, this cake is light and fluffy, a bit chocolatey and also has a distinctive vanilla taste. The vinegar and buttermilk give the cake a soft, spongy texture and add a tiny hint of tang to the cake too.
Expert Tips & Tricks
- A natural food coloring, while tempting, has been known to turn the cake green.
- This cake will keep covered on the countertop for up to 3 days.
- Got a large amount of people who want to dig into this best red velvet layer cake? That’s easy, just double everything and make a four-layer cake or two, two-layer cakes.

More Recipes
Did you make this recipe? FANTASTIC. Please rate the recipe below and be sure to tag me on social when you share a photo on social – I love seeing what you’re up to in the kitchen!

Red Velvet Cake
Ingredients
For the Red Velvet Cake
- 2 cups flour
- 1 ¼ cup brown sugar
- 2 tbsp natural cocoa powder
- 2 tsp baking powder
- 1 tsp baking soda
- ½ tsp salt
- 1 cup buttermilk
- ⅔ cup oil
- 2 eggs
- 1 tbsp red liquid food coloring
- ½ tbsp vanilla extract
- 1 tsp white wine vinegar
For the Cream Cheese Frosting
- 6 oz full fat cream cheese, room temperature
- 6 oz unsalted butter, room temperature
- 1 tsp vanilla extract
- 4-5 cups powdered sugar, sifted
Instructions
- Preheat the oven to 320F and prepare a deep 8 or 9 inch cake tin with cooking spray and parchment paper.
- In a large bowl or in the bottom of a stand mixer, whisk together the flour, brown sugar, cocoa powder, baking powder, baking soda and salt to combine.
- In another bowl or a large jug, whisk together the buttermilk, oil, eggs, food coloring, vanilla and vinegar.
- Pour the liquid mixture into the dry mixture and whisk until just combined and no lumps of flour remain.
- Pour into the prepared tin and drop down a few times onto the countertop to knock out any excess air bubbles.
- Bake for 40-45 minutes until a toothpick inserted into the middle comes away clean. Allow to cool in the tin for 10 minutes before turning out to cool completely on a wire rack.
- Once the cake has cooled, make the frosting. First, in your stand mixer or using a handheld electric whisk, beat together the cream cheese and the butter until completely smooth, followed by the vanilla. Then, working a cup at a time add the powdered sugar until you’ve reached the desired consistency.
- To assemble the cake, using a sharp serrated knife split the cake down the middle to form two layers. On the cake stand or plate you wish to serve the cake on, sandwich the two layers back together with a generous amount of frosting, then apply a ‘crumb coat’ of a thin layer of frosting all over the cake to create a smooth base. Then chill the cake and the bowl of remaining frosting for 30-40 minutes until the frosting coating the cake has just hardened.
- Finish decorating the cake by smoothing over the rest of the frosting.
Notes
Nutrition
Nutrition information is automatically calculated, so should only be used as an approximation.


Made this recipe yesterday and it turned out perfect! Moist and delish! Thank You!
I’m glad it turned out well! Thank you for your review 🙂
This recipe title is for a mug cake, supposedly to serve one person. The ingredients are for a large cake. Very disappointing!
This recipe is titled for a Red Velvet Cake not for a single mug cake. I’m sorry for the confusion!
Tried this last night. Tasted okay, not very chocolatey but I guess red velvet is a “light” chocolate flavor. The texture was spongy as I guess a lot of mug cakes are. I’m still in search of a more “cake” like texture. I will keep looking
This recipe is easy, delicious, and made with things that most people keep on hand! Caramel, pecans, and powdered sugar are the perfect toppings so you can eat it warm! So delicious.
The red velvet mug cake recipe does not come up with the link or with the above search. I would have liked to try it.
So sorry! That was an error with my site at the time that was not allowing recipes to load correctly. Thanks for your patience!
Why cant I find this recipe? It looks so dreamy!!!
Hey! Looks very delicious. Moreover, it’s not too difficult to make so I will try soon. Thanks for your sharing!
I hope you love this recipe, Jacklyn! Thanks for stopping by!
Next time I’m in the mood for a single lady treat this is so happening! perfect for V-day!